


Created
: 2022.09.20


On MetaTrader4 (MT4) / MetaTrader5 (MT5), you can send a notification to the registered email address when the conditions for an alert are met. Please note that the email notifications are only available when MT4/MT5 is running.
The email alerts are often used with Expert Advisors (EA) and indicators to keep you updated on your trades and opportunities while away from your PC. Besides EA and indicators, you can also set the custom rules to receive emails.
Here we will look at how to set up the alerts with email on MT4/MT5.
| Related articles: | Set alerts to run a program |
| Set sound alerts | |
| Set push notification alerts |
Switch between MT4/MT5 tabs to check the steps for each.
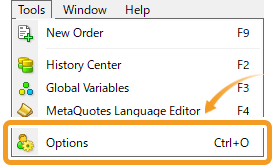
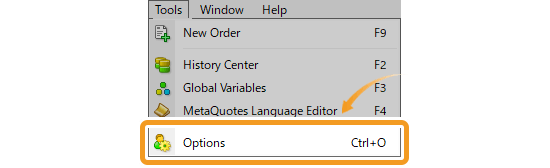
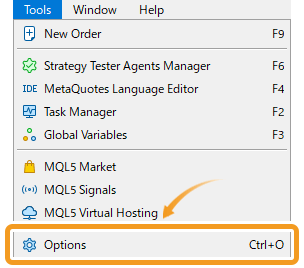
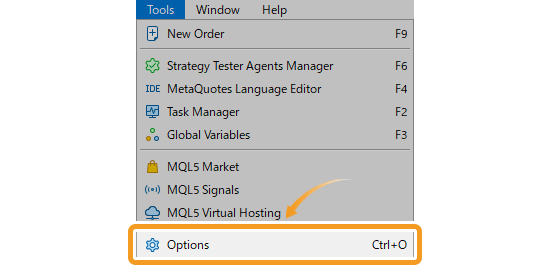
Click "Tools" in the menu and select "Options". (Shortcut keys: "Ctrl"+"O")
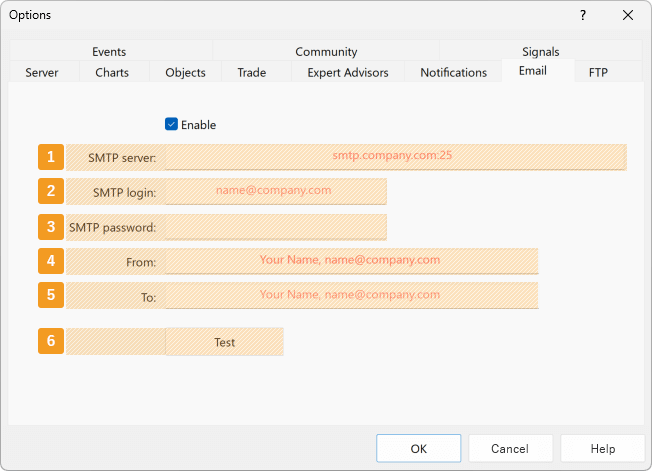
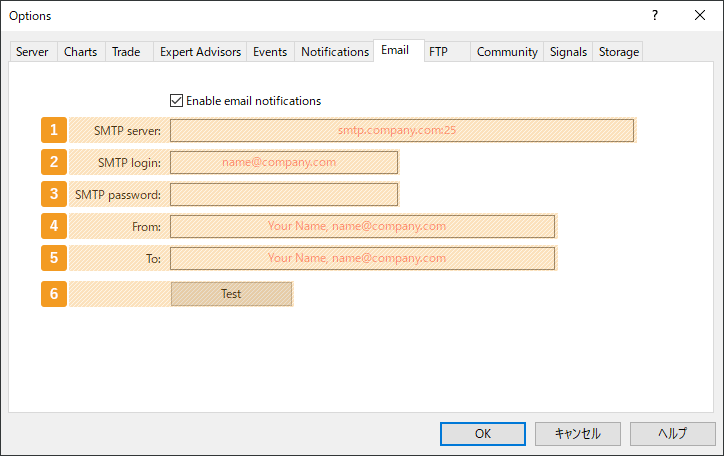
In the "Email" tab, check the "Enable" box. After entering the required information, click "OK".
|
Number |
Item name |
Descriptions |
|---|---|---|
|
1 |
SMTP server |
Enter the IP address and port number for the SMTP server of the sending email account. |
|
2 |
SMTP login |
Enter the login ID for the SMTP server of the sending email account. |
|
3 |
SMTP password |
Enter the password for the SMTP server of the sending email account. |
|
4 |
From |
Enter the email address of the sender. The addresses for "From" and "To" can be the same. |
|
5 |
To |
Enter the email address of the recipient. The addresses for "From" and "To" can be the same. |
|
6 |
Test |
After filling out all the information, you can send a test email by clicking "Test". |
When setting up email alerts using your SMTP server, the settings will depend on the service you use. Please follow the instructions provided by your email services to integrate it with the external service.
If you wish to use email notifications for the alert feature of Expert Advisor (EA) or indicators, you only need to complete step 1 and 2 and no further settings are required. An email will be sent when the conditions set on the EA/indicator side are met. To define the alert conditions yourself, you will need to follow step 3 onwards.
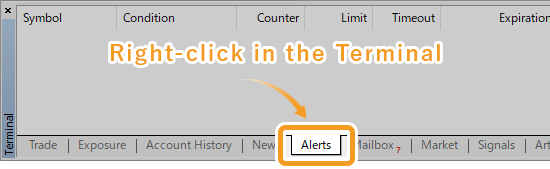
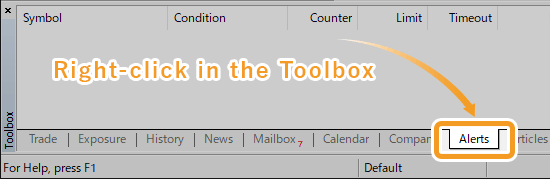
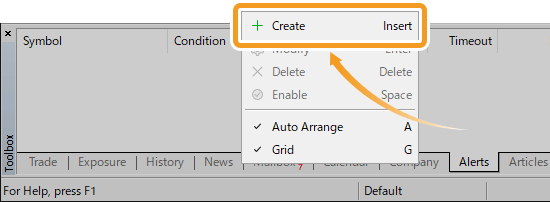
Click the "Alerts" tab of the Terminal and right-click in the tab.
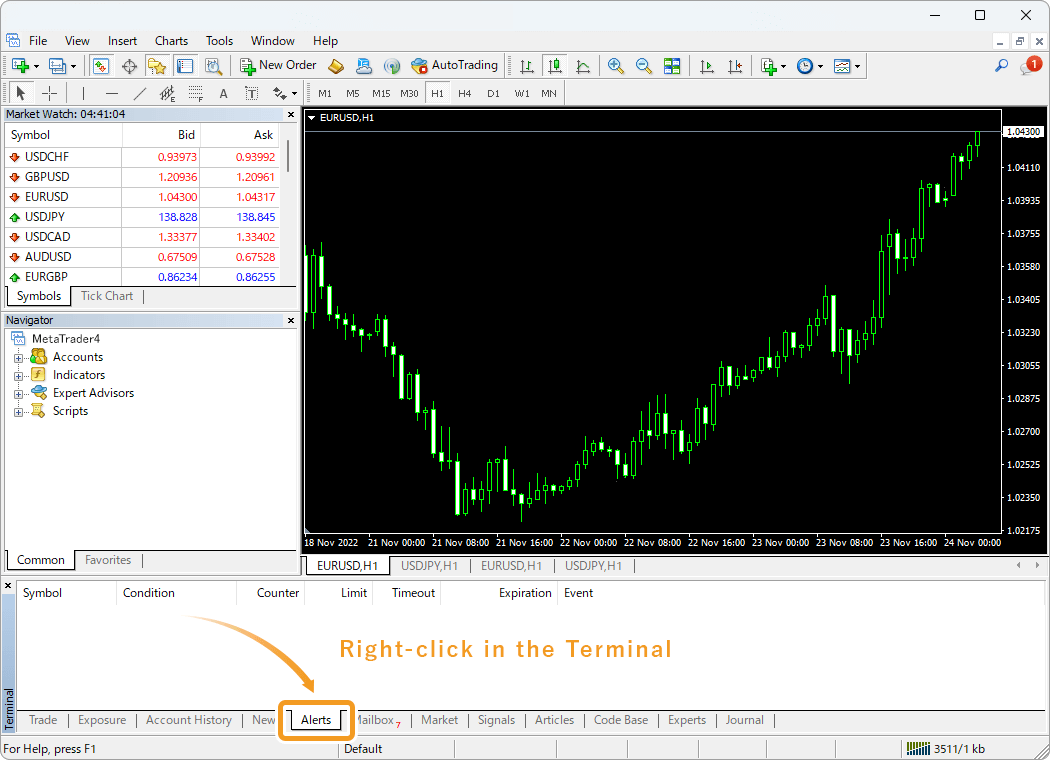
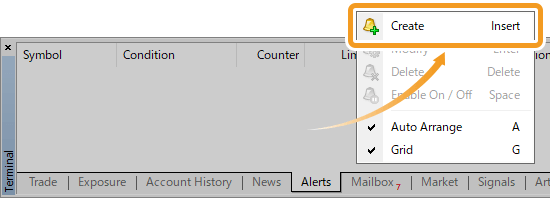
Select "Create" from the context menu.

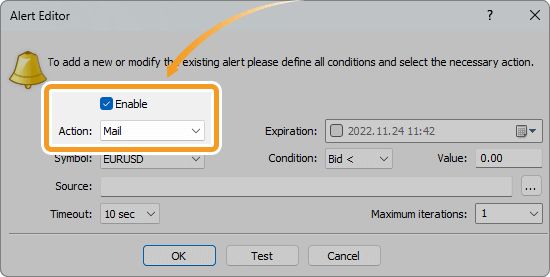
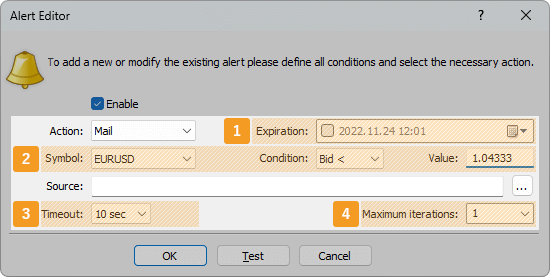
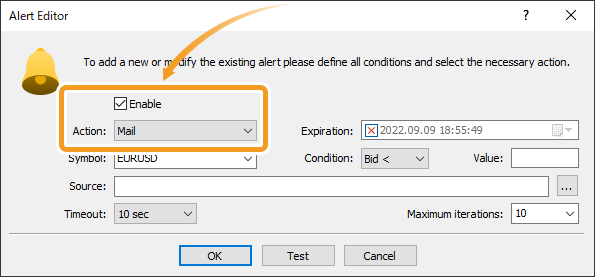
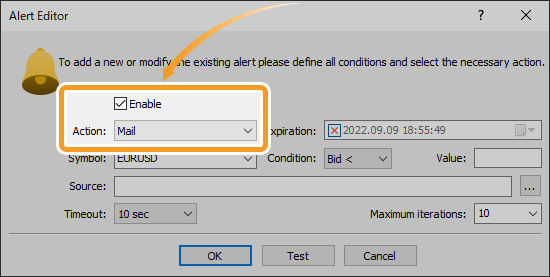
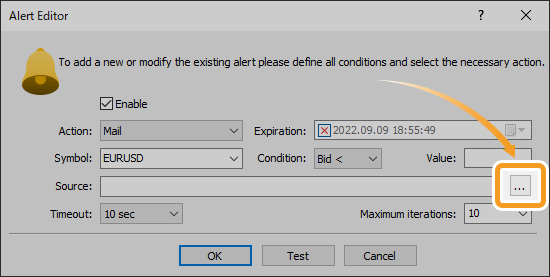
Check the "Enable" box and select "Mail" in the "Action" field.
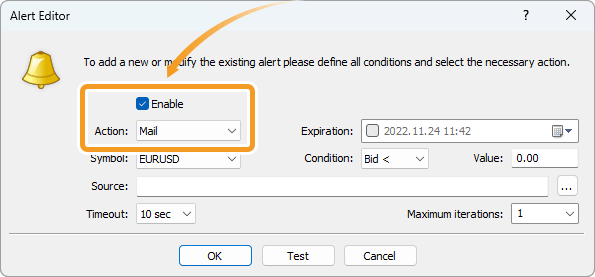
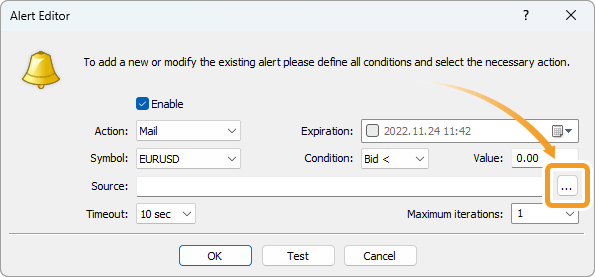
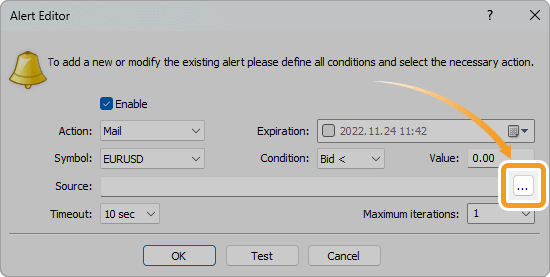
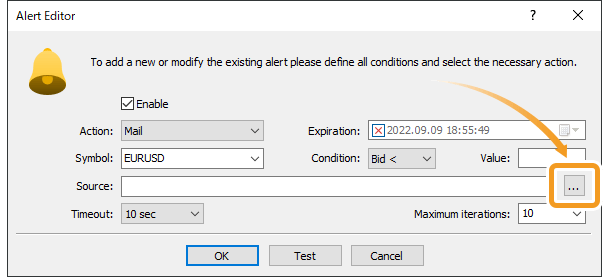
Click the "..." button to the right of the "Source" field.
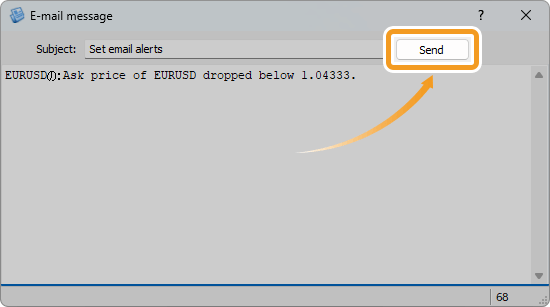
Enter the subject and body and click "Send".
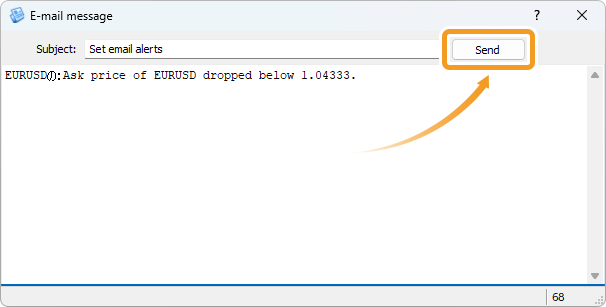
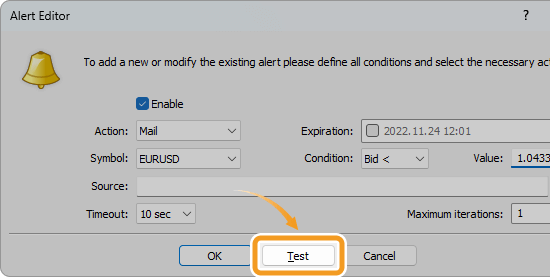
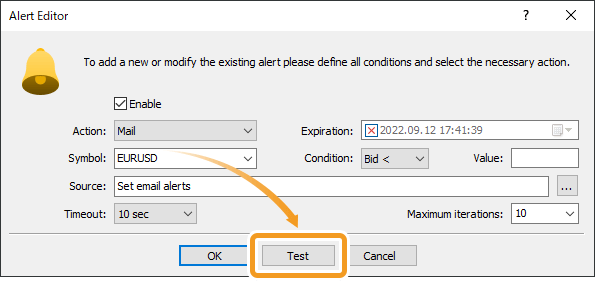
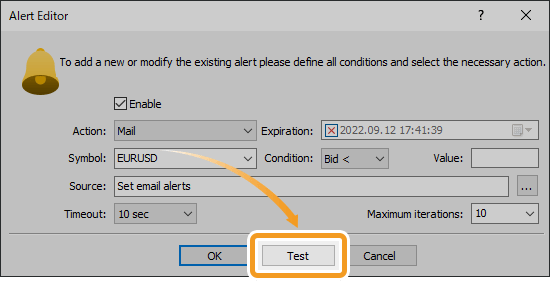
You can send a test email by clicking the "Test" button.
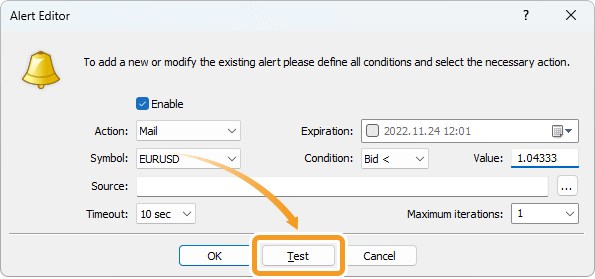
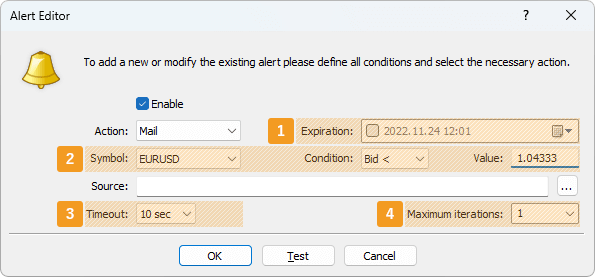
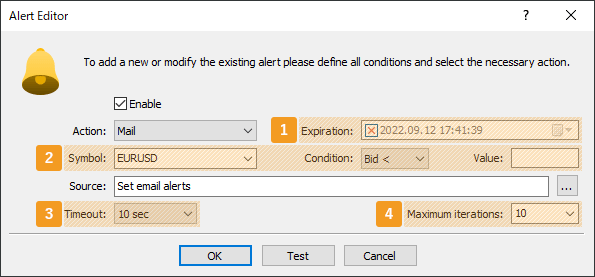
Configure the alert settings and click "OK".
|
Number |
Item name |
Descriptions |
|---|---|---|
|
1 |
Expiration |
Specify the expiration time for the alert. To set the expiration time, check the box and enter the date and time or choose them by clicking the calendar symbol. |
|
2 |
Symbol/Condition/Value |
Specify the symbol, condition, and price for the alert.
Bid <: Notify when the bid price of the symbol goes below the specified price.
Bid >: Notify when the bid price of the symbol goes above the specified price.
Ask <: Notify when the ask price of the symbol goes below the specified price.
Ask >: Notify when the ask price of the symbol goes above the specified price.
Time =: Notify at the specified time. Set the value as "HH:MM".
|
|
3 |
Timeout |
Set a time interval for the email alert to avoid repetitive triggers. For example, if the interval is set to 10 seconds, no additional emails will be sent within that period, even if the condition is met again. |
|
4 |
Maximum iterations |
Set the number of times to repeat the email notifications. Enter or select the number from the pull-down menu. |
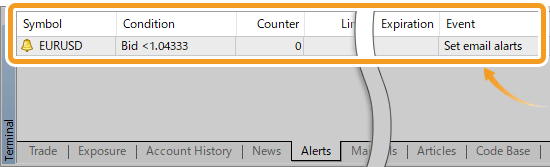
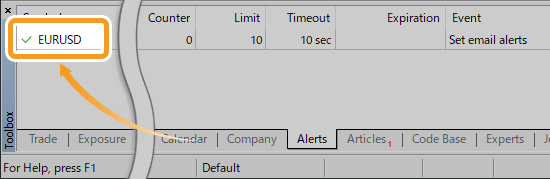
You will see the alert you have set in the "Alerts" tab.

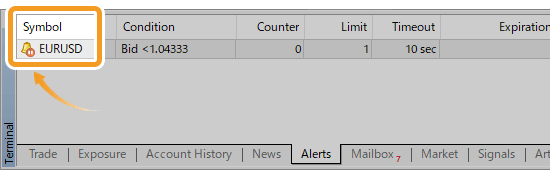
Once the alert is finished, the pause icon will appear on the alert.

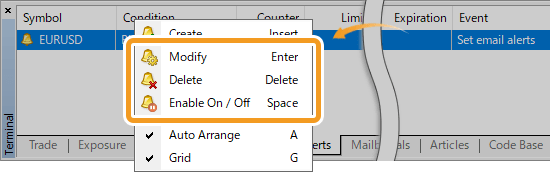
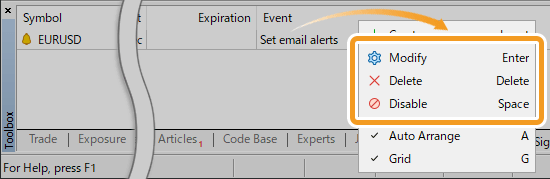
To edit the alert settings, right-click on the alert and select "Modify" in the context menu. You can also select "Delete" if you wish to remove the alert, or "Enable On / Off" to disable it temporarily.

Click "Tools" in the menu and select "Options". (Shortcut keys: "Ctrl"+"O")
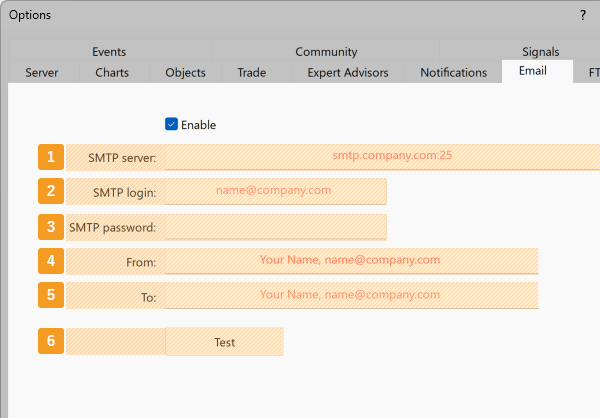
In the "Email" tab, check the "Enable email notifications" box and enter the account details for the SMTP server of the sender, the sending email address, and the receiving email address. Click "OK" to save the settings.

|
Number |
Item name |
Descriptions |
|---|---|---|
|
1 |
SMTP server |
Enter the IP address and port number for the SMTP server of the sending email account. |
|
2 |
SMTP login |
Enter the login ID for the SMTP server of the sending email account. |
|
3 |
SMTP password |
Enter the password for the SMTP server of the sending email account. |
|
4 |
From |
Enter the email address of the sender. The addresses for "From" and "To" can be the same. |
|
5 |
To |
Enter the email address of the recipient. The addresses in "From" and "To" can be the same. |
|
6 |
Test |
After filling out all the information, you can send a test email by clicking "Test". |
When setting up email alerts using your SMTP server, the settings will depend on the service you use. Please follow the instructions provided by your email services to integrate it with the external service.
If you wish to use email notifications for the alert feature of Expert Advisor (EA) or indicators, you only need to complete step 1 and 2 and no further settings are required. An email will be sent when the conditions set on the EA/indicator side are met. To define the alert conditions yourself, you will need to follow step 3 onwards.
Click the "Alerts" tab of the Toolbox and right-click in the tab.

Select "Create" from the context menu.

Check the "Enable" box and select "Mail" in the "Action" field.
Click the "..." button to the right of the "Source" field.
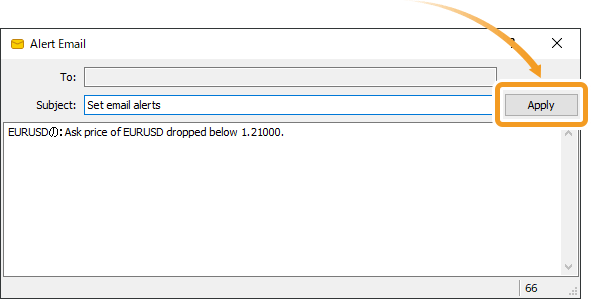
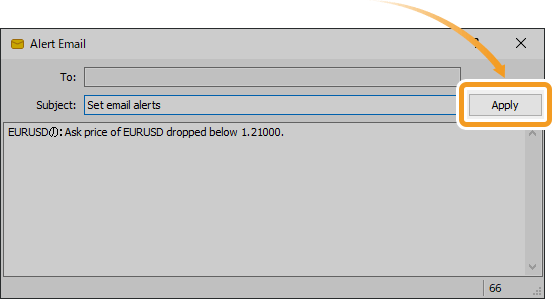
Enter the subject and body and click "Apply".
You can send a test email by clicking the "Test" button.
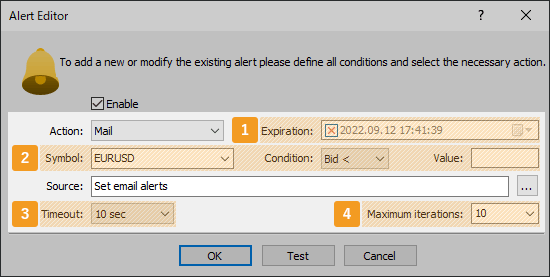
Configure the alert settings and click "OK".
|
Number |
Item name |
Descriptions |
|---|---|---|
|
1 |
Expiration |
Specify the expiration time for the alert. To set the expiration time, check the box and enter or select the date and time. If you don't want to set it, put an X mark in the box. |
|
2 |
Symbol/Condition/Value |
Specify the symbol, condition, and value for the alert. |
|
3 |
Timeout |
Set a time interval for the email alert to avoid repetitive triggers. For example, if the interval is set to 10 seconds, no additional emails will be sent within that period, even if the condition is met again. |
|
4 |
Maximum iterations |
Set the number of times to repeat the email notifications. Enter or select the number from the pull-down menu. |
You will see the alert you have set in the "Alerts" tab.

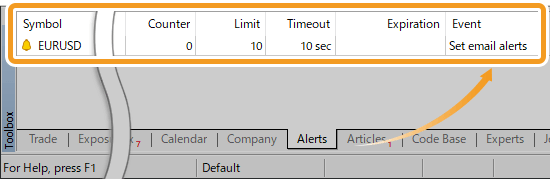
Once the alert is finished, the bell icon will change to a check mark.

To edit the alert settings, right-click on the alert and select "Modify" in the context menu. You can also select "Delete" if you wish to remove the alert, or "Disable" to disable it temporarily.

![]()
Created
: 2022.09.20
![]()
Last updated
: 2026.03.18

Nakamaru is a manual production consultant at FINTECS, a company that specializes in creating manuals for their clients.
With a wide range of experience from fintech to entertainment, he presents what user-friendly manuals should be like.
He works with numerous large corporations as an external manual production project manager.
【Business information】
http://www.fintecs.co.jp/profile/
Akira Takagi
Systems engineer, MetaTrader administrator

After graduating from Computer Science at the Uninove, Brazil, in 2014, he has worked on various systems development projects.
He participated as a developer in the launch of forex services in 2019. Since then, he has also been involved in the development of MetaTrader plugins and APIs. He is certified by MetaQuotes as a MetaTrader5 Administrator and active in consulting and advisory as well.
We hope you find this article useful. Any comments or suggestions will be greatly appreciated.
We are also looking for writers with extensive experience in forex and crypto to join us.
please contact us at [email protected].

MT4/MT5: Connect your MQL5 account
![]() 2023.03.01
2023.03.01
![]() 2026.07.07
2026.07.07
Here we will look at how to connect your MQL5 account on MT4/MT5. By connecting your MQL5 community account on MT4/MT5, you can use indicators and automated trading systems that you get on the MQL5 community and other features.

MT5: Open Task Manager
![]() 2023.02.24
2023.02.24
![]() 2026.07.07
2026.07.07
Here we will look at how to open the Task Manager on MT5. You can access the Task Manager to check how much of your PC's resources is being used. If MT5's performance is slowing down, use it to find out the cause.
MT5: Enable two-factor authentication
![]() 2023.02.24
2023.02.24
![]() 2026.07.08
2026.07.08
Here we will look at how to set up two-factor authentication on MT5. To enable it, you need to have an authenticator app installed on your phone beforehand. Two-factor authentication is not available on MT4.

MT4/MT5: Check messages from broker
![]() 2022.09.21
2022.09.21
![]() 2026.07.05
2026.07.05
On MT4/MT5, you can check the messages from brokers and MetaQuotes. Please note that messages will not be displayed if your broker is not sending emails, or if the message from MetaQuotes is not enabled. Here we will look at how to check messages.
MT4/MT5: Check news
![]() 2022.09.20
2022.09.20
![]() 2026.07.05
2026.07.05
On MT4/MT5 you can check the news from MetaQuotes and the media each broker partners with. Please note that news will not be displayed if your broker does not partner with any media, or the news from MetaQuotes is not enabled.

MT4/MT5: Set alerts to run a program
![]() 2022.09.20
2022.09.20
![]() 2026.07.08
2026.07.08
On MT4/MT5, you can set various types of alerts for a specific time, for when the symbol price reaches a certain level, or for when the last traded volume is bigger or smaller than the specified value. Here we will look at how to set up the alerts to run a program.
Disclaimer:![]()
All information and content provided on this website is provided for informational purposes only and is not intended to solicit any investment. Although all efforts are made in order to ensure that the information is correct, no guarantee is provided for the accuracy of any content on this website. Any decision made shall be the responsibility of the investor and Myforex does not take any responsibility whatsoever regarding the use of any information provided herein.
The copyright in our content belongs to us.
We welcome your use of our content within appropriate limits, including use through our sharing features, sharing on social media, and quotation. However, please refrain from unauthorized reuse, including but not limited to commercial use, reproduction with modification of content, or reproduction on websites that compete with us. We may take necessary measures, including but not limited to deletion of the relevant content, if we consider that the content has been used in an inappropriate or unauthorized manner.
Myforex uses cookies to improve the convenience and functionality of this website. This website may include cookies not only by us but also by third parties (advertisers, log analysts, etc.) for the purpose of tracking the activities of users. Cookie policy
